Thursday, October 12, 2017

Juki Smart Solution - Juki DDL-900B Direct-drive, High-speed, 1-needle, Lockstitch Machine with Automatic Thread Trimmer (“DRY” Oil Pan System)

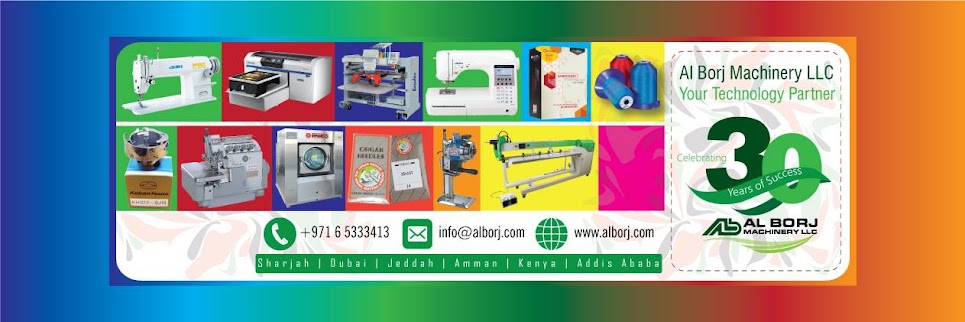
Juki Corporation is one of the leading industrial machine manufacturers and ranks as the no.1 in sewing machine manufacturer in the world. Headquartered in Japan, the company currently has manufacturing facilities in Japan, China, Vietnam and markets its products in more than 150 countries across continents.

Now a day’s industry are facing a few problem like:-
  • Skilled operator 
  • Employment 
  • Labour cost & Operation Cost 
  • Quality 
  • Productivity 
So, Our answer is JUKI SMART SOLUTION.......................

Direct-drive, High-speed, 1-needle, Lockstitch Machine with Automatic Thread Trimmer (“DRY” Oil Pan System)

DDL - 900B Series


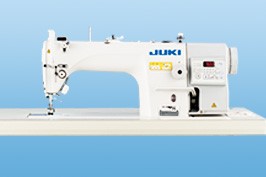
The sewing machine which integrates the direct-drive motor, control box and control panel into a monolithic body is now provided with a new oil shielding mechanism. It not only eliminates oil stains on sewing products, but also further enhances workability and maintainability.
A. Elimination of oil stains on sewing products
In order to prevent oil stains on sewing products, the sewing machine has adopted the “Oil Shielding System” which is integrated into the sewing machine bed. The needle bar is lubricated with a smaller quantity of oil as compared with the conventional model. In addition, oil which externally splashes is shielded by the newly-developed frame oil recovery mechanism and automatic oil circulation mechanism. The new structure contributes to the achievement of the maximum sewing speed of 5,000 sti/min and also to increased productivity.

B. Oiling and oil-quantity checking can be done with ease The oil hole is located on the top of the machine arm. The oil quantity can be easily checked with the oil gauge mounted on the top of the bed without tilting the machine head.

C. Broadened range of adjustment of the hook oil quantity The adjustable range of the oil quantity in the hook has been broadened to enable fine adjustment. In addition, the bottom of the underside cover contains an oil-quantity adjustment marking which helps prevent oiling errors. As a result, main trainability is improved.
D. Highly-functional control panel The control panel which belongs equivalently to the highly-functional CP-180 family is built into the control box. With this panel, various sewing data ranging from the sewing speed to the production support functions can be adjusted. In addition, the control panel has been newly provided with a password lock function to restrict panel operation. The machine may be used simply by entering any given pass code number

E. Compact and small energy-saving direct-drive motor In comparison with the conventional V-belt driven sewing machine, the sewing machine driven by the direct-drive motor saves power consumption by 25%. Furthermore, the new retry control helps increase the material penetrating power of the needle by approximately 10%.
F. Provided as standard with LED lighting which illuminates the needle entry area Since the LED lights cast their light exactly downward to illuminate the needle entry area from the right and left sides of the needle bar, sewing work can be carried out more easily as compared with the use of light from one direction. In addition, the luminance of the LED lights can be adjusted in five steps and can be used as an auxiliary light for work

G. Highly-functional touch-back switch JUKI's sewing machine which is provided with a thread trimmer is also provided as standard with the renowned needle breakage preventing function. The main shaft angle control works to prevent needle breakage even when the touch-back switch is used to perform reverse feed stitching. The height of the touch-back switch is adjustable according to the items to be sewn

credit: juki corporation

Monday, May 29, 2017

DIY Easy Kaftan Dress / Cover Up

DIY Easy Kaftan Dress


Shop Now: https://shop.al-borj.com
by: Mao
Copy rights: www.sparklybelly.com

DIY Kaftan Dress / Cover Up

Kaftan dresses are comfortable and  very feminine. They are perfect as summer dresses, and keeping one in your dance bag is a great idea because it can be used as a cover up before and after dance performance.

To make this simple kaftan dress / cover up, you need:

Lightweight, flowy fabric – It can be light knit, chiffon or anything that drapes nicely. You need about 3m (3.3yd) of this.
Sewing tools.

How to Make a Kaftan Dress / Cover Up:

First, stand in front of a mirror with your fabric. Fold the fabric wrong sides together, hold it up against your body and see how long you want your dress to be. Hold the fold, and lay the fabric on the floor, and cut the excess fabric.

Next, fold the fabric in half lengthwise, and mark the corner, which is the centre point on the fold. From there, measure and mark 15cm or 6in on either side of the centre point with pins.
Mark neck line for Kaftan dress
Unfold the fabric and cut along the fold to connect the 2 points.
Cut neckline for Caftan dress
At this point, try it on to make sure the head hole is large enough, and take it to your sewing machine and finish all raw edges by however way you like. I’m practicing using a hemmer foot, so that’s what I used. If you are patient, you can do a rolled hem all the way around, or you can do a zigzag stitch or if you have a serger, use your serger.

Back on the floor, fold it wrong sides together again, and measure about 40cm or 16in from the fold and from the side edge and mark the point with a pin. From there, measure 40cm or 16in down to the bottom, and make a line. Do the same for the other side.
Stitch Lines and Button Holes for DIY Kaftan Dress
Now all you need to do is sew down along the lines using a straight stitch.  ðŸ˜€

This is optional, but if you want to wear a belt or a tie around your waist area, mark the width of your belt at the top of the lines you just sewed, and we’ll make button holes there.

For the buttonholes, you can make them without a special foot. Simply decide how big you want the hole to be, and draw a line. Then, go around it with a narrow zigzag stitch with the stitch length very close to 0. Try not to sew over the line, just go around it. And simply cut along the line without ripping the stitches.
Button Hole for Caftan Dress DIY
If you want to make a matching tie, cut a long strip out of the leftover fabric. I used the whole width of the fabric, and made it about 5cm or 2in wide, and sewed a tube right sides together with a 5mm or 1/4in seam allowance. Turn the tube inside out, and stitch the ends shut.

Monday, May 22, 2017

How to Make Easy Roman Shades

Instead of reaching for pricey shades and curtains when updating a room, combine the two and create some sophisticated, easy-to-make Roman shades.


Shop Online Now: https:shop.al-borj.com
Article Courtesy: www.diynetwork.com


Step 1:


Cut Pattern and Fabric

Measure your window's height and width. Add 12" to the length and 4" to the width. This is the size you'll use to cut your fabric. Make sure that any design detail on the fabric is centered.

Step 2:

Hem the Sides

Hem the edges for a nice finished look. Start with the long sides, make a double-turn hem. Place the fabric pretty-side down, and make a 2" fold on one of the long sides. Measure and pin it so you know it's nice and straight, then iron the crease. Remove the pins and fold that fold in half so it’s only an inch wide. Pin and iron again, then sew over the hem with the sewing machine, about 1/8" in from the inner edge of the hem. Use the edge of your presser foot as a guide and remember to back stitch. Repeat the process on the other side.
Step 3:

Create Bottom Hem

The bottom hem is going to be super wide so that it gives the whole shade enough weight to hang straight. Fold it just like you did for the long sides, but this fold is going to be 4". Measure, pin and iron it flat, then fold the hem again using the 4" hem as a guide so you've got a 4" double hem. Pin and iron again.
Step 4:

Top Rod Pocket Hem

For the top hem, make a hollow pocket to slide the curtain rod through. With the pretty-side down, fold over fabric 2", pin and press, then fold it again another 2", press with the iron. Sew across the hemline. Again, use the presser foot as a guide. Backstitch at both ends of the seam to make it nice and sturdy.
Step 5:

Cut and Place Ribbon Ties

Choose ribbon that is at least 1" wide, in a color that complements the fabric. You need two pieces of ribbon, double the height of the window plus two feet. Fold the ribbon pieces in half and position them over the top of the rod pocket, with half the ribbon behind the panel and half in front, pretty-side out. Then space them evenly, about a quarter of the way in from each side, and make sure the ends are even.
Step 6:

Pin Ribbon Ties

Pin the ribbon in place, make sure the pins go all the way through to the ribbon on the other side. Sew them in place along the top seam.
Step 7:

Create Bows

Tie the ribbons at whatever length you want the shade to hang. We used double bows, but the ends can also be folded and tucked out of sight.


Tuesday, May 16, 2017

Our Story | Celebrating 30 years of Success | Al Borj Machinery LLC

Welcome To Al Borj

Al Borj was established back in 1987 being the pioneer and market leader in supplying machinery, equipment, spare parts, consumable and services to the apparel manufacturing industry in the GCC, Middle East and MENA region. Through continuous effort, hard work and motivation of Al-Borj team members and appreciation from our valued clients it has successfully completed its 30 years of excellence and still look forward to further new ventures and product lines.


Al Borj Machinery LLC
Copyright Al Borj Machinery LLC. 
All Rights Reserved

To BUY Our Machines Contact:
hassan@alborj.com
www.alborj.com
https://shop.al-borj.com

Buy Now: https://shop.al-borj.com | e: info@al-borj.com | t: +971 6 5333413

Shop Online Now | Organ Needles

#OrganNeedles The types of sewing machine needles have increased due to the diversification of sewing. We propose a wide variety of needle part shapes in order to meet the wide demand with the most suitable needle.

Buy Online Now: 
https://shop.al-borj.com/needles.html


#alborjmachineryllc #Needles #SewingMachine#Juki #Organ #GarmentFactory #Tailors #Fashion#Dubai #Sharjah #UAE #Nairobi #Jeddah#AddisAbaba #Amman

Sunday, May 14, 2017

How to Make a Rug From Upholstery Fabric


Looking for the perfect rug to match your couch or curtains? Learn how to turn home decor fabric into a fabulous area rug.


Shop Online Now: https:shop.al-borj.com
Article Courtesy: www.diynetwork.com


Step 1:


Position Layers of Fabric

Lay the no-slip rug pad on the floor. Press it flat to remove all creases. Lay the cotton batting on top of the rug pad, also pressing out any creases or folds. Then lay the fabric right-side up on top of those two layers, making sure it is nice and flat as well (Image 1). Cut off any excess around all four sides so that all three layers are the exact same size (Image 2).
Step 2:


Pin Layers Together

Pin the three layers in place in various spots around the rug (Image 1). Make sure the three layers stick together and do not shift. You should now have a nice large three-layer rectangle or square, pinned all around the edges and center (Image 2).

Step 3:

Cut Border Fabric

From the outer edge fabric, cut four 4" strips of fabric from selvage to selvage (width of fabric). You may need to cut more strips if your rug is larger than the width of your fabric and sew the strips together.
Step 4:


Fold Borders

Iron the strips as if you were making your own homemade bias tape. Fold each strip in half wrong-sides together, straight down the middle and iron to create a crease. Open up the fold and then fold in the outer edges 1/4" towards the wrong side and press flat (Image 1). Repeat for all four strips. Fold the strip in half again, enclosing the 1/4" edge folds in the center, and press (Image 2). Repeat for all four strips. Now you're ready to bind your rug.
Step 5:

Pin Border to Rug

Unfold one strip and place it right-side down (with the folds facing up) along the edge of one side of your rug. Keep the edge of your binding about 1-1/2" away from the edge of your rug, and pin along the 1/4" folded line. Do this for only ONE side of the rug.
Step 6:


Stitch Border to Rug

Sew the binding in place using a heavy-duty needle. Sew directly on the 1/4" fold line so you won't see the stitches when the binding is folded back over. Remove the pins as you sew (Image 1). Fold the binding over the raw edge of the rug, enclosing the side of the fabric. The center fold of the binding should be the outer edge of the rug. Pin in place. Sew directly on top of the binding to secure in place (Image 2). You can also hand sew the bottom binding in place with a whipstitch if you do not want to see a stitched line along the top.

Step 7:


Sew Adjacent Border

To work on the adjacent edge, place the binding along the edge as you did the first time, but allow a few inches to hang off of each end (Image 1). Fold the excess fabric over the corner towards the back of the rug and pin in place (Image 2). It should look something like this. Sew the binding onto the rug as you did for the previous sides (Image 3).

Step 8:

Finishing Steps

If your rug has some wrinkles in it, use an iron on a low-setting to carefully get them out. Just make sure to press gently, and not let the iron linger because you do not want to melt the no-slip rug pad underneath.


Tuesday, April 11, 2017

Make your own abaya

One big advantage of making your own clothes is that you can use better and more healthy materials as the synthetic ones so often used for abayas nowadays. If your surroundings are not very hot, you can get away with a good cotton, or even better, a nice linen. Linen is ideal, it can retain far more moisture as cotton, therefore it will be feeling cool. In a really hot environment a light silk would be the best choice. Silk is usually very expensive, but that is a market mechanism. To buy in bulk, a decent silk doesn’t cost much more as a good cotton. So do shop around! Because of it’s luxury reputation, the shops put a much larger margin on it, making it more expensive. It might also be a good idea to buy a cheaper undyed material, and dye it in the color of your choice. With delicate materials it is best to try a small piece first. Dupioni silk is usually fairly cheap, but it looks a bit stiff. I do like the rough texture though, and you can get it in all sorts of colors, and in pretty changeant weaves too.


Article & Copy Rights: 
by thuriayaa
http://sewing4rlife.blogspot.ae
BUY Sewing/Embroidery machines / Software's from http://shop.al-borj.com

dupion-silk1

Fastenings:
You can use snaps, hooks, zippers, buttons or velcro, it is your own choice. Velcro may sound easy, but has spelled doom for many a pretty delicate shayla. I think the easiest option is buttons, and, instead of making the quite complicated buttonholes, make a loop, use a bit of nice ribbon, or cord. If you use a different color it will be a decorative feature.

Measurements of the patterns:
I can’t give exact measurements on these designs, you have to find out your own measurements. The measurements you need are in the drawing underneath. Instead of experimenting on some beautiful material, I suggest you buy some very cheap cloth, like an unbleached cotton, and stitch it loosely, or even just pin it together, try it on and make changes as you like. Once your try-out is to your liking, you unpin or pick out the stitching, and you can then use the pieces of material for your own perfectly fitting pattern.
If your pattern is precisely cut on your finished dress/abaya, make sure you allow an extra 1,5 cm for stitching and edging the material. I would not line an abaya, because you use it over your clothes in mostly hot countries, so to add even extra material would be even more suffocating. If you add a lining for effect you could choose to only line the bottom of your abaya or sleeves.

abayamaking

Above you see an example on how you could lay out the pattern on your material. lay out your pieces, and move them around until you have them placed as economically as possible. Note down how much material you need, handy to know, especially if you plan on buying an expensive material next time. Most cloth comes at a width of 1.50 meter. Some more exclusive materials are only 1,20 wide. In that case you can’t slip in the sleeves at the sides, and you need 2× your length, #5. And 1× your sleeve length, #2.

abayamaking1

These are the measurements you need, work them out for yourself, and make a trial-abaya which you can unpick, or cut up, and use as your personal pattern. Draw the pattern on your real material with special tailor chalk. The sleeve on pattern #1 is a wide sleeve, but if you draw the line to the seam you get a fitted sleeve. This also shows how you can make variations, once you have a good pattern. I only use basic patterns myself, and chance them when drawing them with chalk on the material for the design of a specific garment I’m making.
Pattern #1 and #2 have an overlapping front. You can easily adapt #1 so it won’t overlap. If you use an overlapping front, you nee to put in at least two extra buttons or snaps on the inside, to keep the bottom layer of cloth from sagging down. On pattern #1 you can see three light doth which are sugestions for the inside buttons or snaps.

This second pattern is really a Japanese kimono. This is a véry simple pattern and should be well in reach of everybody who would like to try and make something. Simple forms are also a nice canvas for your own decorations.

abayamaking2

With the kimono pattern, you don’t have to be careful with the shoulder seam, it’s supposed to slip from the shoulder a bit. You can make a much wider kimono, by cutting the front and back-panels for a much wider shoulder, and then create three folds which you stitch for about 25cm.

abayamaking3

Pattern #3 is a very simple basic traditional butterfly design. Not handy in daily life, but very pretty. You can decorate the sleeve cuffs, or even make them of a different material. Like a Chinese brocade.
Once you have tried making one of these, experiment with different cuts, or try your hand at adding some nice decorations. In part 2 I will give some ideas for decorating your abaya. (or anything else)

abayamaking4

Monday, April 10, 2017

How to Make Headbands Out of Shirts

Celtic knots represent infinity and eternity because they don't contain beginnings or ends. In ancient times, if a gift was adorned with a Celtic knot, it was thought to give the recipient longevity or good luck in new adventures. This no-sew headband is made with a Shannon knot, which symbolizes balanced creativity, a fitting emblem because it makes creative use of old T-shirts. You have to see how easy this is! Watch the video below.

To Buy Sewing Machines follow the link: https://shop.al-borj.com Source & Copy Rights: By Beth Huntington (eHow)
Celtic knot headband (Images: Beth Huntington)


Celtic knot headband


Choose a large T-shirt in your desired color.
Choose a large T-shirt in your desired color. (Image: Beth Huntington)


Step 1

Use sharp scissors to cut two 1 1/2-inch wide strips across both layers of the T-shirt. Do not use the hemmed bottom edge of the shirt. Each strip will have two layers.
Cut two strips from the T-shirt.
Cut two strips from the T-shirt. (Image: Beth Huntington)

Step 2

Stretch the strips. Do not unfold the two layers. Grab each end and pull tightly until the strip rolls into itself.
Pull the strips tightly.
Pull the strips tightly. (Image: Beth Huntington)

Step 3

Create a loop with one of the strips by crossing the right side over the left side. Keep the loop at the top.
Create a loop.
Create a loop. (Image: Beth Huntington)

Step 4

Lay the second strip in a U-shape on top of the first strip. Place the ends at the top.
Add the second strip.
Add the second strip. (Image: Beth Huntington)

Step 5

Place the right side of the top piece under the right side of the bottom piece.
Weave the right side of the top piece under the bottom piece.
Weave the right side of the top piece under the bottom piece. (Image: Beth Huntington)

Step 6

Place the left side of the top piece under the loop of the bottom piece.
Weave the left side of the top piece under the bottom loop.
Weave the left side of the top piece under the bottom loop. (Image: Beth Huntington)

Step 7

Place the right side of the top piece over the loop of the bottom piece, passing under the left side of the top piece and then over the other side of the loop.
Pull the right side of the top piece through.
Pull the right side of the top piece through. (Image: Beth Huntington)

Step 8


Pull on each end gently and slowly until a neat knot is created and you have loose strips of fabric on each side of the knot.
Pull the ends to create the knot.
Pull the ends to create the knot. (Image: Beth Huntington)

Step 9


Wrap the strips around the head of the person who will be wearing the headband to mark where to cut the ends. Or measure the person's head circumference and cut the ends to that length. Cut a 2 1/2-by-3 1/2-inch piece of T-shirt and place both ends of the headband on top.
Place the ends on top of the 2 1/2-by-3 1/2-inch piece.
Place the ends on top of the 2 1/2-by-3 1/2-inch piece. (Image: Beth Huntington)

Step 10


Spread some hot glue onto the tops of the headband ends.

Tip
  • You could use fabric glue instead of hot glue, but it will take longer for the glue to dry.
Use hot glue on the headband ends.
Use hot glue on the headband ends. (Image: Beth Huntington)

Step 11


Roll the 2 1/2-by-3 1/2-inch piece of T-shirt tightly around the glued ends of the headband. Use caution when rolling the fabric to avoiding burning your fingers.
Roll the small piece of fabric around the glued ends.
Roll the small piece of fabric around the glued ends. (Image: Beth Huntington)

Step 12

Let the glue dry for a few minutes, slip the headband on and enjoy some balanced creativity of your own.